I am sure that every owner of Apple AirPods can confirm they’ve been facing an issue with AirPods while they are connected, but there was no sound.
If your Apple AirPods experience this issue, it can be pretty frustrating, especially if you own a new model or your AirPods have served you well for a long time.
Do not worry; there are easy tricks you can do to solve these issues on your own, and based on feedback from other people, these steps can fix the problems with Apple AirPods are connected but not working correctly.
Apple AirPods are Connected, but there is No Sound – How to Fix it?
If your AirPods are not working correctly, perform these steps:
Turn OFF Bluetooth on your phone and turn it back ON. Then, go to Settings – Bluetooth – Info – Forget This Device. Now pair AirPods with the phone by opening the AirPods case and holding the back button for about 10 seconds.
This procedure will reset and re-pair Apple AirPods with your device, and the connection should be working back again successfully.
If the connection still needs to be fixed, don’t be afraid. There are several easy steps we will follow to help you to resolve the issue. Apple is well aware of the problem, but they haven’t acknowledged it as its issue; however, there are several proven ways to fix it.
1. Reset Bluetooth
Your AirPods show they’re connected, but the connection seems to need fixing. You first have to try resetting your Bluetooth on your device.
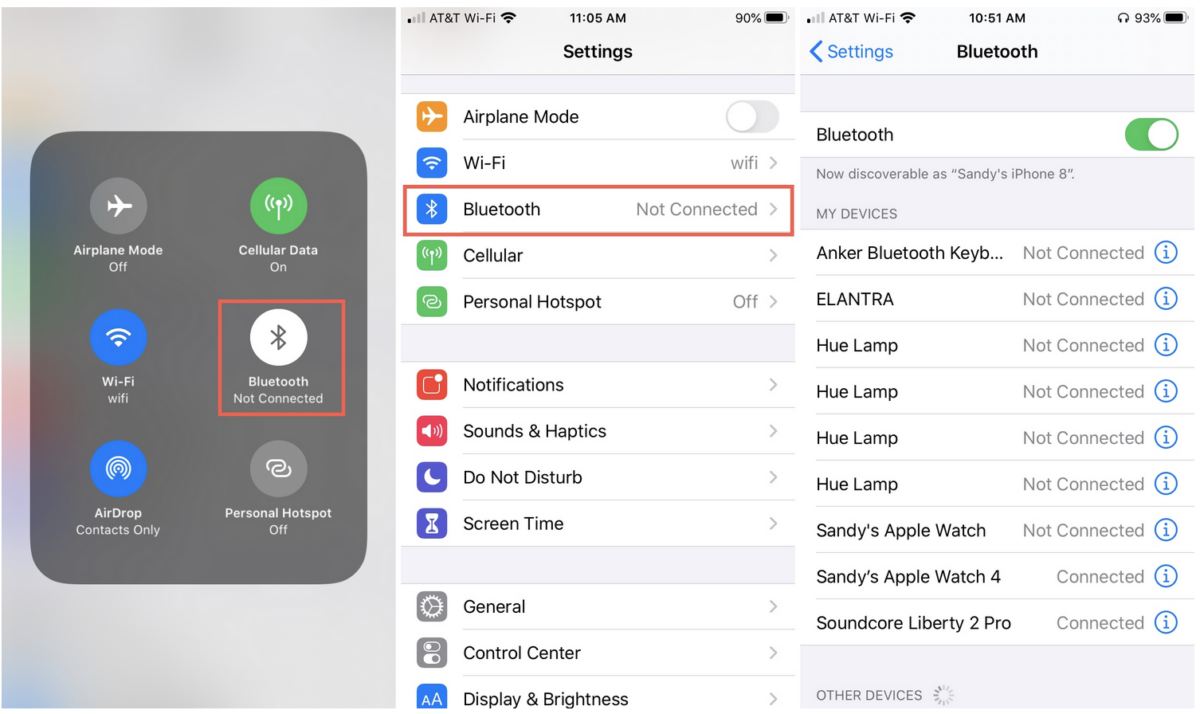
Follow these easy steps to reset your Bluetooth:
- Go to the Settings
- Select Bluetooth
- Toggle Bluetooth off and wait 20 seconds
- Toggle Bluetooth back on
- Select your Apple AirPods and try to connect them
Another option is to swipe down from the top right corner and tap on the blue Bluetooth icon in your control center so the icon is now grey. Then, wait approximately 20 seconds and tap on the icon again – the color changes to blue.
Note: You must swipe up from the bottom for iOS devices with a touch ID to access the iOS control center.
If the connection problem persists, give it a try resetting your Bluetooth once more before moving to other steps. It has been proven in most cases that this easiest step fixed the issue.
Move on further if an additional reset of Bluetooth didn’t help you to fix the issue.
2. Reset Apple AirPods
Resetting your Apple AirPods is another easy way to fix connection issues. A bit more complex, but 90% of the users fixed their problems by doing this.
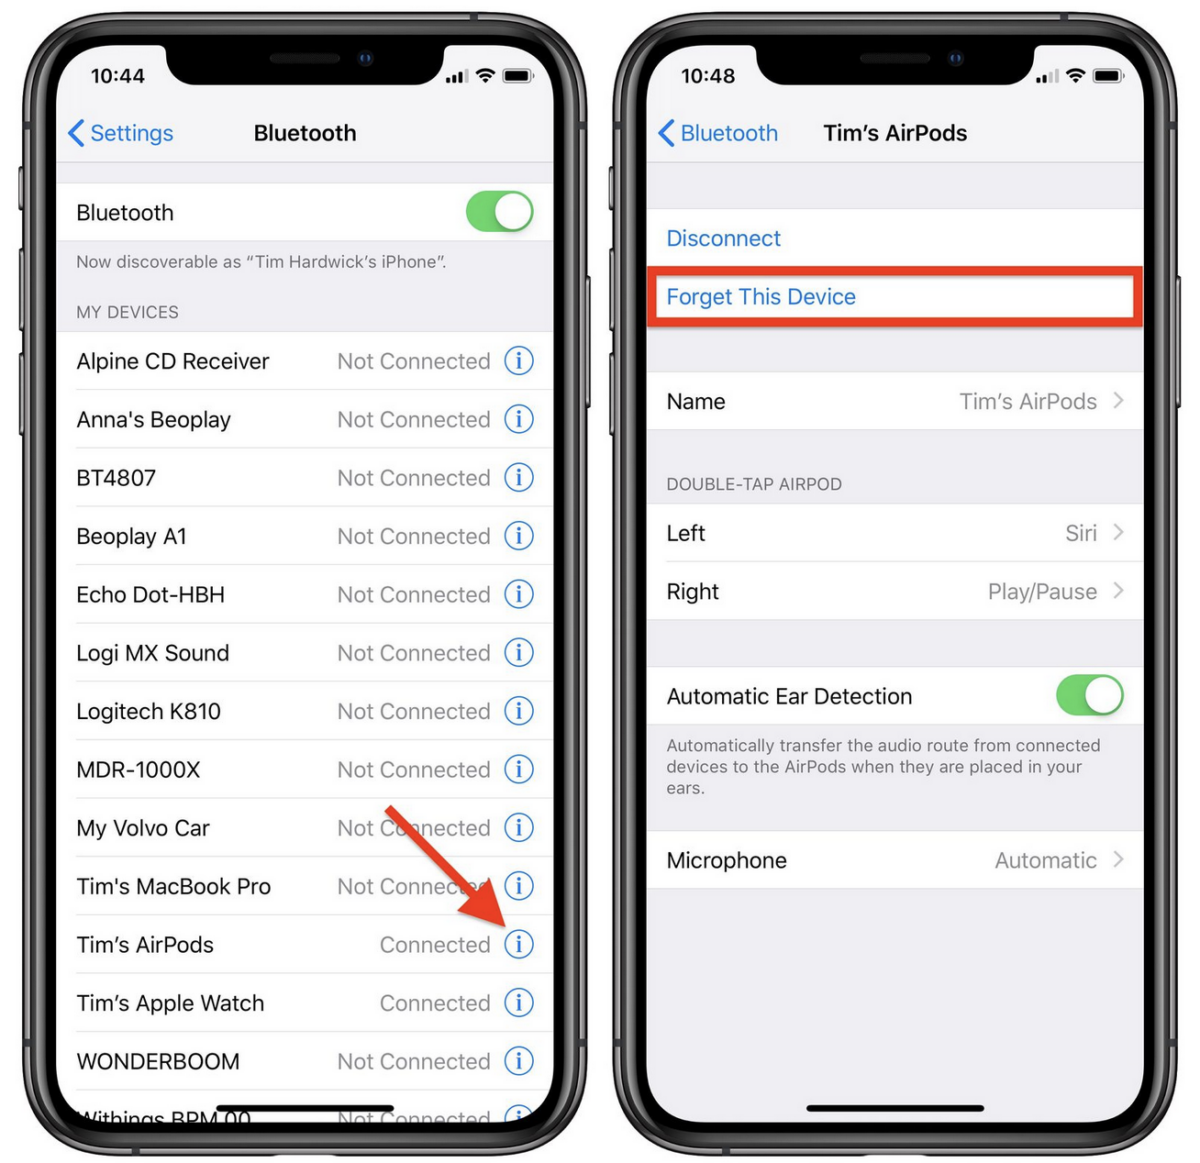
As a first part, you need to Forget This Device:
- Go to Settings
- Select Bluetooth
- Click on the info icon next to your AirPods
- Select Forget This Device
- This step will remove your AirPods from your device
Now, when your Apple AirPods have been removed, follow these steps to pair them back with your device:
- Make sure you enabled Bluetooth on your device
- Place both Apple AirPods into the case and open the case’s lid
- Press and hold the button on the back of your charging case until the led is blinking white
- A pop up window will appear on your device – select Connect
- It might take a couple of seconds, and your AirPods connect to the device.
If the steps above don’t resolve the issue, continue with the further steps below.
3. Reset your iPhone
The issue can be with something other than your Apple AirPods but can point to the problem with your iPhone.
There are two elementary and quick steps how to reset your iPhone.
First – have you tried turning your iPhone Off and On again?
You can resolve many software failures and bugs just by simple iPhone restart, as it will remove all the temporary files from the device so that the restart will clear all current software states.
To restart iPhone with touch ID:
- Hold the side button
To restart iPhone without touch ID:
- Hold the side button and the volume button at the same time
Second way is to reset Network Settings on your iPhone:
- Open the Settings
- Scroll a bit down to General
- Select Reset at the bottom of your screen
- Choose Reset Network Settings
4. Update iOS on your Device
Always keep your device up to date. By running the most recent software, you eliminate all the possible compatibility gaps with other devices, not only your Apple AirPods, and keep your device secure.
Last but not least, all the new releases of iOS also bring new features to the end users.
If you don’t want to think about it or check for an update manually, you can enable automatic updates on your device.
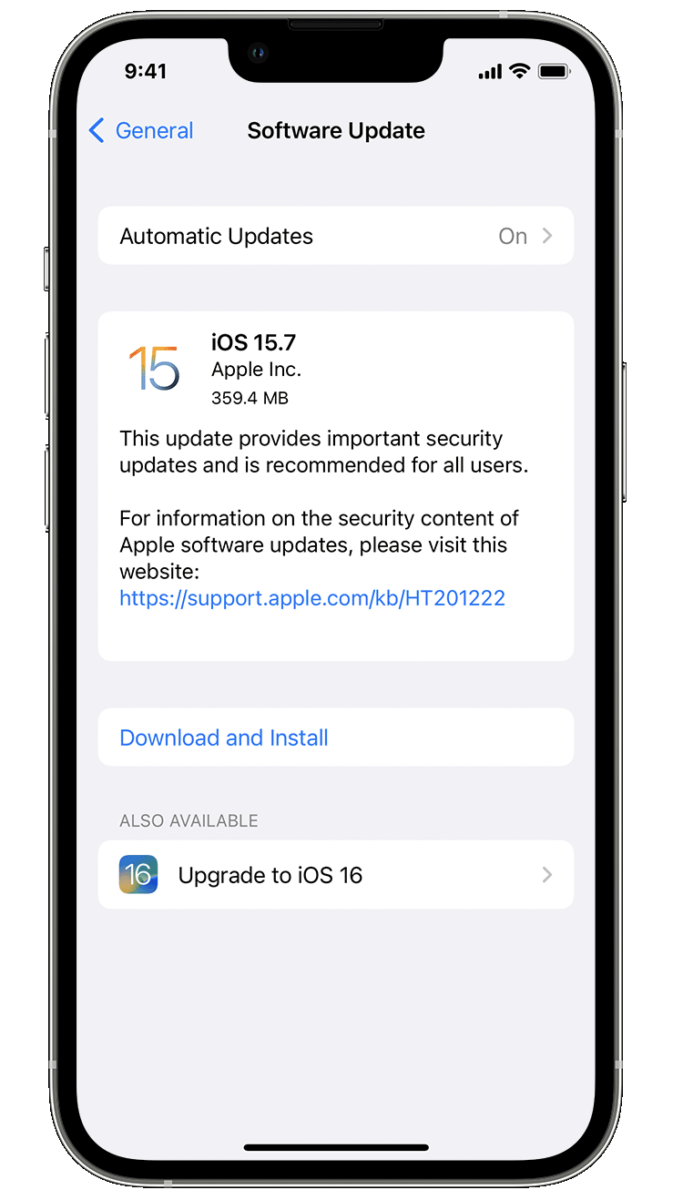
Update iOS and enable automatic updates by following these steps:
- Go to Settings
- Scroll down to General
- Select Software updates
- Choose Automatic updates
- Toggle Download iOS updates and Install iOS updates
- Go back and check if there is any pending update available
- If yes, select Install Now.
Once again, always keep your device up to date.
5. Turn off Nearby Devices
Ensure that you don’t have any nearby Bluetooth devices that could interfere here. If there are some, power them off.
For example, any other phones, headphones, keyboards, and so on in the area.
As another alternative, you can go to your iPhone Settings and Forget the device for every paired device with your iPhone. You’ve already seen more information here.
Once following these steps, you can be sure there are no other devices that could be causing the issue with the AirPods connection.
6. Clean Apple AirPods and Charging Ports
I am sure you’ll agree that while using your Apple AirPods, it happens that they get dirty from time to time. It could be caused by dirt, grime, earwax, etc., either in your Apple AirPods or the charging case. All of these things can cause sound issues.
Grab Q-tip and clean these areas gently:
- Metal ring at the bottom of your AppleAirPods
- You can also add a little bit of isopropyl alcohol at the end of your Q-tip if required – approved by Apple.
- Speaker of your Apple AirPods
- in case you need to clean your Apple AirPods Pro, you need to remove the tip first
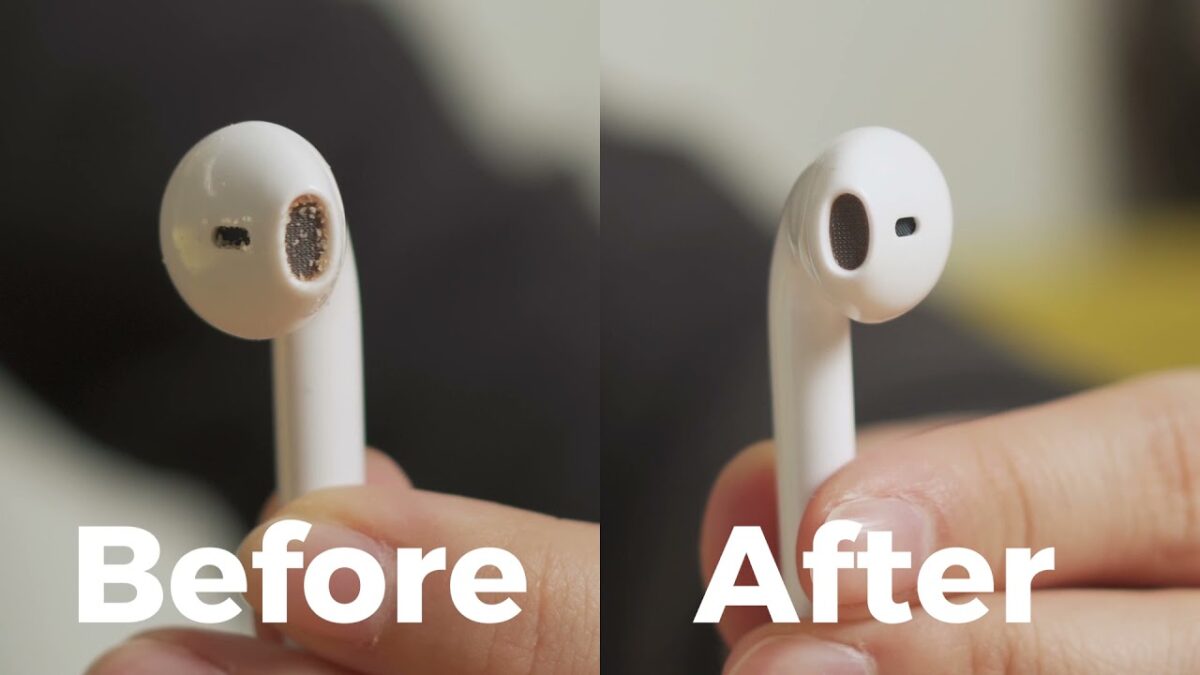
- Clean your AirPods charging case as well
Following the steps above improves your Apple AirPods sound and volume intensity significantly.
7. Turn off Automatic Ear Detection
Apple AirPods have built-in technology to identify when they are in your ear.
When the device gets the confirmation, the audio starts to play automatically.
One of the primary root causes of this feature is not working correctly because your Apple AirPods are dirty or covered by earwax. So make sure you follow the steps above.
Start with disabling Ear Detection feature in your Settings:
- Go to Settings
- Select Bluetooth
- Tap on the Info button next to your AirPods
- Scroll down a bit and toggle OFF Automatic Ear Detection
Remember that by disabling this feature, your Apple AirPods will play the audio even if you put them off from your ears.
8. Charge your Apple AirPods
Remember that if your Apple AirPods have a low battery (10% or less), they might lose connection, sound quality, volume, or microphone functionality.
Because of the reasons above, it’s always best to keep your Apple AirPods fully charged. And it’s not that hard since Apple AirPods can charge fully in approx. 1 hour. Which is just brilliant, isn’t it?
To Sum Up …
Apple AirPods can face sound quality, volume, and connection issues like any other wireless headphones. However, if you check all tips and guides on this page, there is a high chance you will resolve your problem with your Apple AirPods.
Let’s start with the easiest step, resetting Bluetooth on your device, which is the root cause in most cases.
If your Apple AirPods are still facing an issue with sound quality or volume – and you followed all the steps in this article, you should look for an expert to help you in this area.
With some older models, buying a new one can be a great idea. With headphones, you can get significantly better sound quality, including a full warranty, for a slightly higher price.
If your Apple AirPods are new, check if you still have a warranty on your device and use that if possible.